Welcome! Today I'll show you how you can remove woodchip wallpaper from your walls easily and efficiently. Are you having trouble with stubborn woodchip wallpaper? No problem, I'll help you with that. In this guide, learn how you can remove woodchip wallpaper using simple methods and tools.
Preparation is everything
What tools do you need?

To effectively remove woodchip wallpaper from the wall, you need some specific tools and materials. Here is a list of the most important supplies:
- spatula or wallpaper remover: A wide spatula or a special wallpaper remover will help you scrape the wallpaper off the wall.
- Water sprayer or tassel: To moisten the wallpaper, making it easier to remove. A water sprayer is ideal for smaller areas, while a brush is more effective for larger walls.
- Bucket of warm water and dish soap: A mixture of warm water and dish soap can help loosen the paste.
- Safety glasses and gloves: To protect your eyes and hands from splinters and chemicals.
- cover or old newspapers: To protect the floor and furniture from moisture and wallpaper residue.
- Presenters: In case you need to reach higher areas of the wall.
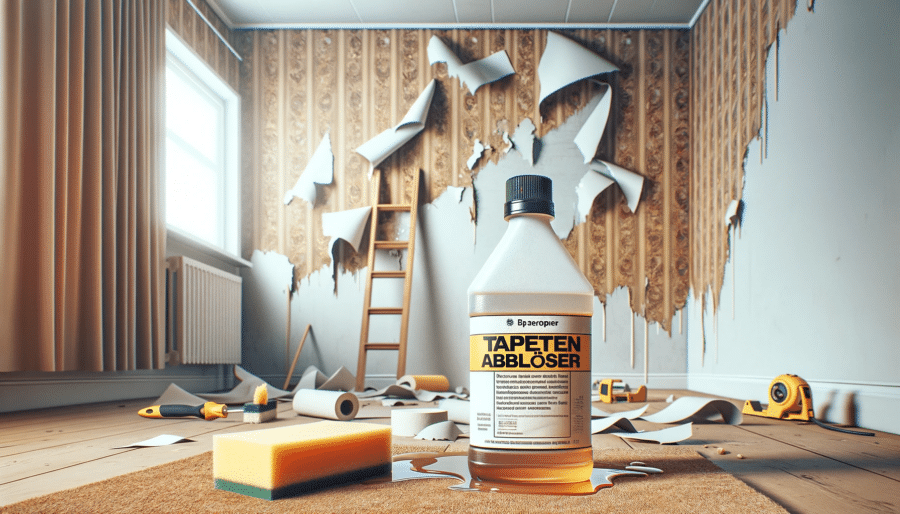
- Wallpaper stripping agent: If the water and detergent mixture is not enough, a special stripping agent may be more effective.
- sponge or rag: To apply the water or stripping solution to the wallpaper.
- trash bags: For the disposal of old wallpaper.
- heat gun (Optional): Can be helpful for particularly stubborn wallpaper to soften the adhesive.
These tools and materials will help you remove the woodchip wallpaper from the wall efficiently and safely. Make sure you make all the necessary preparations before starting work to make the process as smooth as possible.
Take safety precautions
When removing woodchip wallpaper, it's important to take some safety precautions to protect your furniture and floors. Here are some helpful tips:
- Remove or cover furniture: If possible, move all furniture out of the room. If this is not possible, cover them thoroughly with tarpaulins or old sheets to protect them from moisture and wallpaper residue.
- Cover floor: Use a thick drop sheet or old newspapers to completely cover the floor. Make sure that the foil or newspapers are firmly secured so that they do not slip.
- Secure sockets and switches: Turn off the power in the room and cover electrical outlets and switches with tape to protect them from moisture.
- Ventilate the room: Provide good ventilation in the room to remove moisture and minimize possible stripper odors.
- Personal protective equipment: Wear safety glasses to protect your eyes from splinters and dust. Gloves protect your hands from sharp edges and chemicals.
- Be careful when working on ladders: If you use a ladder, make sure it is stable and safe. Avoid leaning too far forward or to the side.
- Tidy workspace: Keep your work surface tidy to avoid tripping hazards. Regularly clean up peeled pieces of wallpaper and other debris.
- Avoid moisture damage: Avoid excessively moistening the walls. Excessive moisture can damage the substrate and adjacent areas.
By following these safety precautions, you can effectively protect your furniture and floors and ensure that the wallpaper removal process is as safe and efficient as possible.
Old vs. new woodchip wallpaper
Removing woodchip wallpaper can be challenging depending on whether it is an older or newer wallpaper. Here are the main differences and how they affect shedding:
Old woodchip wallpaper
- Glue type: Older woodchip wallpapers were often attached with stronger, sometimes even water-insoluble, adhesives. This can make it difficult to remove.
- Multiple layers: It is common for old woodchip wallpaper to be wallpapered over. Multiple layers can make removal more complicated.
- Condition of the wallpaper: Over time, the wallpaper can become brittle and tear more easily when removed.
- Subsurface condition: The surface to which the old wallpaper was applied can be damaged, especially if too much force is used when removing it.
New woodchip wallpaper
- Modern adhesives: Newer wallpapers often use more easily removable adhesives that can be activated with water or steam.
- Quality of the wallpaper: The quality of woodchip wallpaper has improved over the years, which can make it easier to remove.
- Improved techniques: Newer wallpaper is often designed to be removed more easily and in larger pieces.
- Eco-friendly options: Many newer wallpapers are more environmentally friendly and contain fewer harmful chemicals, which should be taken into account when removing them.
Influence on detachment
- Old wallpaper often require more patience and the use of stronger removal methods or agents. Sometimes it is necessary to remove the top layer to access the adhesive underneath.
- New wallpapers can often be removed using simpler methods, such as applying warm water or steam. They tend to come off in larger pieces.
In both cases, it is important to test the wallpaper on a small, inconspicuous area first to determine the best method for removing it. Regardless of whether it is old or new woodchip wallpaper, patience and care are key elements for successful removal.

Checking on multiple layers
The presence of multiple layers of wallpaper on a wall is a common scenario, especially in older buildings. Here are some steps to detect the presence of multiple layers and act accordingly:
Detecting multiple layers of wallpaper
- Visual inspection: Look closely at the corners and edges of the wallpaper. You can often see multiple layers here, especially if the top layer is peeling off around the edges.
- Feel: Run your hand over the surface of the wallpaper. Multiple coats often feel thicker and less uniform.
- Test pulling: Try peeling off a piece of wallpaper in an inconspicuous area. If several layers come off, this is a clear sign.
Procedure for several layers of wallpaper
- Remove top layer: Start by removing the top layer. Use a spatula or wallpaper remover and work your way carefully.
- Use of water or steam: After the top layer is removed, apply water or steam to the next layer to loosen the adhesive. Wait a few minutes to let the water soak in.
- Proceed in layers: Remove each layer individually. It is more efficient and less damaging to the substrate to work in layers rather than trying to remove all layers at once.
- Powerful but careful: Use enough force to remove the layers, but be careful not to damage the plaster or plasterboard underneath.
- Use removing agents: For particularly stubborn layers, the use of a special wallpaper remover may be necessary.
- Prepare surface for redesign: After removing all layers, the wall surface should be smoothed and prepared for redesign. This can include filling, sanding and priming.
Removing multiple layers of wallpaper can be time-consuming, but with patience and the right technique, this challenge can be overcome. Make sure you take the necessary safety precautions throughout the entire process.
Wet or dry – which is better?
The choice between the wet and dry method depends on various factors such as the type of wallpaper, the condition of the wall and personal preferences.
The wet method
Step-by-step instructions for moistening and peeling:
- Preparation: Make sure the room is well ventilated. Cover the floor and all furniture.
- Prepare tools: You will need a water sprayer or brush, warm water, dish soap and a putty knife.
- Water-dishwashing liquid mix: Mix warm water with a little dishwashing liquid in a bucket or sprayer.
- Moistening the wallpaper: Apply the water and dish soap solution generously to the wallpaper. Use the sprayer or brush.
- Application time: Allow the liquid to act for a few minutes so that the paste softens.
- Detach: Start at a corner or edge and carefully peel away the wallpaper with the spatula. Work your way little by little.
- Rework: If necessary, repeat the procedure to remove stubborn residue.
The dry method
How to dry strip the wallpaper and when this method is suitable:
- The dry method is best for wallpapers that are dry strippable. This is often the case with newer types of wallpaper.
- Start by pulling on a corner or edge. If the wallpaper comes off easily and in large pieces, the dry method is a good choice.
- Use a putty knife to carefully separate and peel the wallpaper.
- This method is less messy and faster, but it doesn't work effectively on all types of wallpaper.
Use of release agents

A selection of products and how to use them:
- Wallpaper stripper: There are several commercially available products specifically designed for removing wallpaper. These agents are usually mixed with water and then applied to the wallpaper.
- Application: Follow the instructions on the packaging. The agent is usually applied and has to take effect for a certain amount of time.
- Detach: After the exposure time, carefully scrape off the wallpaper with a spatula as with the wet method.
- Safety: Be sure to wear protective gloves and safety glasses if necessary, as some strippers can be irritating.
No matter which method you choose, it's important to be patient and work carefully to avoid damaging the wall.
Home remedies as an alternative
When removing wallpaper, you can also use natural and inexpensive home remedies, which are an effective alternative to commercial strippers. Here are some best practices:
- Warm water and dish soap: One of the easiest and most effective methods is to use a mixture of warm water and a few drops of dish soap. The dish soap will help dissolve the adhesive. Apply the mixture to the wallpaper with a sponge or sprayer and let it sit for a few minutes before scraping the wallpaper.
- Vinegar-water solution: Mix equal parts white vinegar and warm water. The vinegar acts as a natural solvent and helps soften the glue. This solution is particularly effective for older or more stubborn adhesives.
- Steam: If you don't have a commercial wallpaper steamer, you can use a steam cleaner or even a pot of boiling water. Hold the steam close to the wall to soften the adhesive. This is a particularly good method for multiple layers of wallpaper or very old wallpaper.
- Baking soda and water: A paste made from baking soda and water can also be effective. Apply the paste to the wallpaper and let it take effect. The baking soda is slightly abrasive and helps break down the adhesive.
- Fabric softener and water: A mixture of fabric softener and warm water can also be a good alternative. The fabric softener helps dissolve the glue and makes removing the wallpaper easier.
Patience is required when using home remedies as they may not work as quickly as commercial strippers. It is also advisable to test a small, inconspicuous area first to ensure the solution will not cause damage. You should also wear gloves throughout the entire process to protect your hands.
Practical examples and tips
Practical use cases: examples from everyday life
- Remove woodchip wallpaper in an old building:
- A family moves into an old house and wants to remove the outdated woodchip wallpaper. They use the wet method with a vinegar and water solution to effectively dissolve the old glue.
- Renovating a children's room:
- When redesigning a children's room, the decision is made to replace the woodchip wallpaper with a brighter, friendlier wallpaper. The dry method is used here because the wallpaper is newer and can be easily removed.
Step-by-step instructions: Detailed instructions for various woodchip wallpapers
- For newer woodchip wallpaper:
- Check whether the wallpaper is dry strippable.
- If so, start at the corners and carefully peel away the wallpaper.
- If there is resistance, soak the wallpaper with a warm water and dish soap solution and then use a putty knife.
- For older or multi-layered woodchip wallpaper:
- Apply a vinegar-water solution or a homemade stripper.
- Let the solution sit to soften the glue.
- Use a putty knife to carefully remove the wallpaper in sections.
In short: remove woodchip wallpaper
- Preparation is crucial: Make sure you have all the tools you need and protect furniture and floors.
- Recognize the wallpaper type: Distinguish between older and newer woodchip wallpaper as this will influence your approach.
- Choose the right method: Use the wet method for stubborn or old wallpaper and the dry method for newer, easy-to-peel wallpaper.
- Home remedies can be effective: Use vinegar-water solutions, steam, or a baking soda paste as cost-effective and environmentally friendly alternatives.
- Proceed in layers: Remove multiple layers one at a time to avoid damaging the substrate.
- Patience and care: Be patient and proceed carefully to achieve the best possible result.
Removing woodchip wallpaper can be a challenging task, but with the right techniques and a little patience, it's definitely doable. Remember that the result – a fresh wall free for redesign – is worth all the effort. You have all the information and tips you need to complete this project successfully. Dare to take it into your own hands and enjoy the satisfaction that comes with a successfully completed home improvement project.
Have you already had experience with removing woodchip wallpaper? Or are you planning such a project? Share your experiences, tips or questions in the comments. Your feedback is valuable to improve this guide and help other readers with their projects. Let’s learn and grow together – any tip or trick is welcome!
- Dilute the active concentrate with water according to the preparation table and apply generously with a ceiling brush. Possibly multiple times.
- After 5-10 minutes of exposure time, remove the wallpaper strips from the surface with a spatula and peel them off in layers.
- Wash tools with water immediately after use.
- All your special window scraping work such as paint, tape, stickers and construction debris such as stucco or caulk can be done quickly and...
- The paint scraper is made of a classic single-sided carbon steel razor blade, sharp and durable. The length of the blade is 4...
- The handle of the glass scraper is made of thick metal rod and non-slip rubber, ergonomic grip surface that provides extra comfort and…
- highly effective, odorless, strong dissolving properties
- transparent, surfactants easily degradable, high penetrating ability
- approx. 5-15 minutes exposure time
- strong depth effect, very economical, strong dissolving properties and extremely high penetration capacity
- odorless, solvent-free, contains easily biodegradable surfactants
- approx. 15 minutes exposure time
- High quality material: KZXXZH wallpaper scrapers are made of high quality stainless steel, flexible, durable and smooth. Blade in mirror polished…
- Thickened Blade: The thickness of the spatula knives is designed at 0,8mm, not easy to break, long service life, providing you with great power,…
- Ergonomic comfort handle: The spatula knives are equipped with a large rubber handle that provides you with a comfortable grip edge and allows you to...
* Product images & links | Source: Amazon PA API | Last update on 24.04.2024/XNUMX/XNUMX | * = Affiliate links | Prices quoted on this website may have changed. The actual price of a product can be found on the seller's website. Real-time updates are technically not possible. Prices including VAT plus shipping costs


